Reliability beats ambition
- Keep the first water path short and understandable
- Favor containment over maximum spread
- Scale only after the material path behaves consistently
- Use every stall as information about the real bottleneck
Most early frustration comes from unstable circulation. Water disappears where you wanted it to stay useful, sand moves in inconsistent ways, and a promising setup keeps needing manual rescue. These tips focus on reliability first.
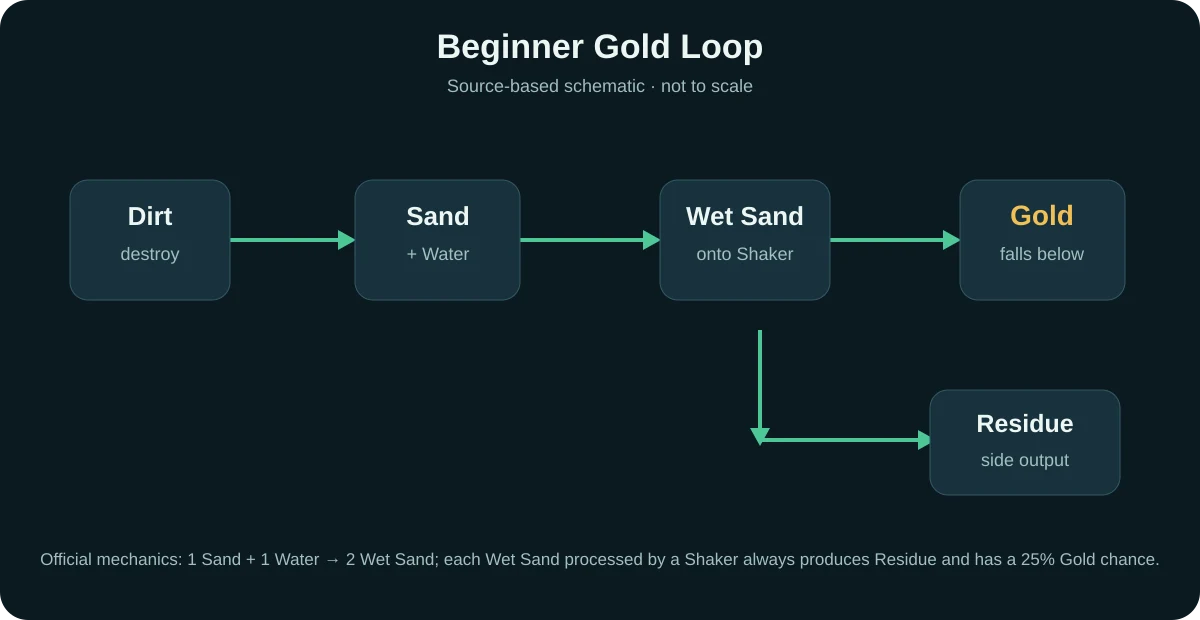
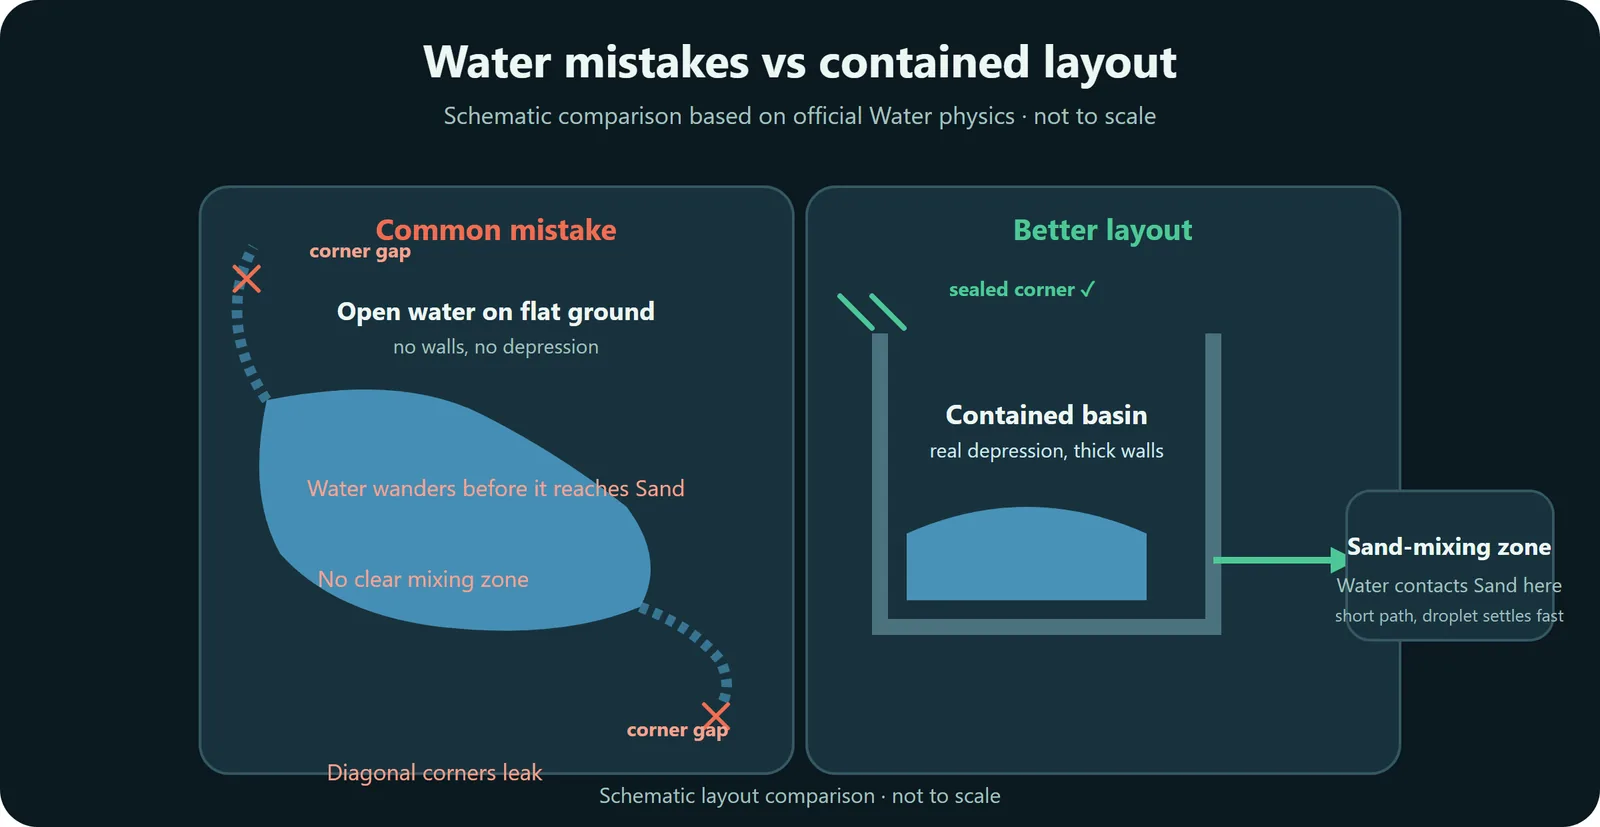
The opening two hours reward four habits that protect your water, your wet-sand line, and the Shaker staircase built on top of them. Each habit has an observable sign so you can confirm it is working.
A droplet that does not settle into a depression within 45 seconds evaporates, and liquid can slip through where two block corners meet. Channel water into a basin with sealed diagonal joints so it stays where you put it.
Checkpoint: the basin holds its level and nearby Sand keeps darkening into Wet Sand.
The farther the early chain stretches, the more places it can go wrong. Keep the loop compact so a vanishing, backing-up, or leaking pixel is easy to spot and fix in place instead of being out-built.
Checkpoint: when something stalls, you can point at the exact tile that broke.
The Shaker only accepts Wet Sand, and 1 Sand plus 1 Water becomes 2 Wet Sand, so the water step both feeds the machine and doubles the material. Route the water supply to meet the sand before the input.
Checkpoint: Sand darkens on contact and the Shaker keeps running instead of idling.
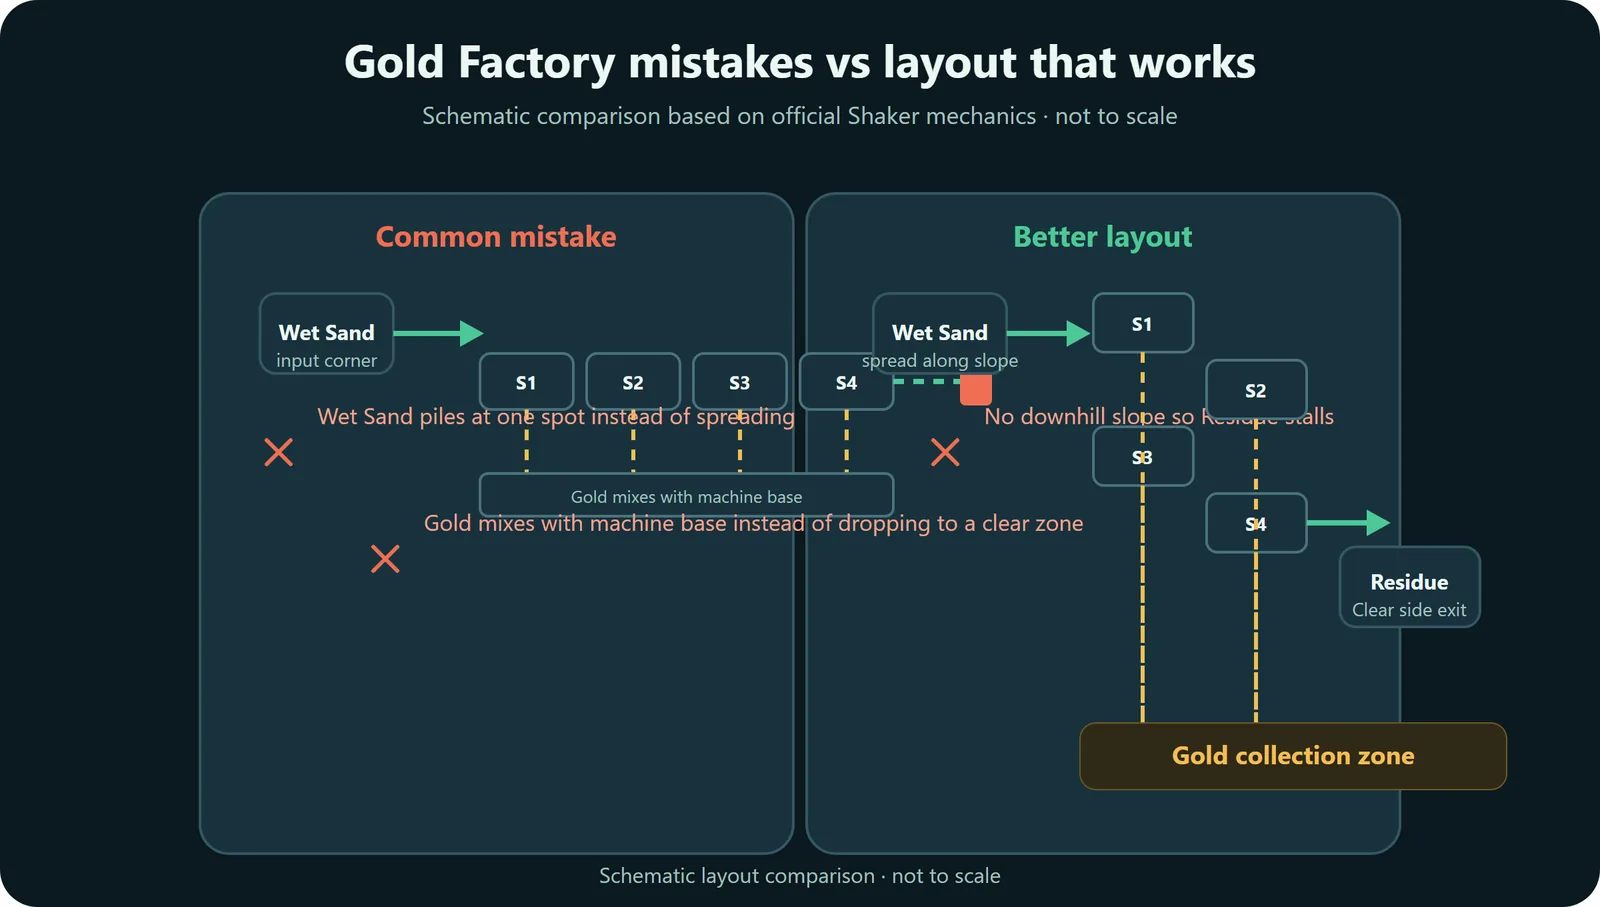
One Shaker sheds its leftover Residue very slowly, and anything but Gold lodges inside the body. Slope several Shakers into a descending staircase so gravity keeps the tops clear as they fill.
Checkpoint: Residue slides off the top edge while Gold falls through the bottom.
Three early stalls and the fix for each, so a broken loop becomes a short fix instead of a full rebuild.
Water slipped through a gap or sat unsettled long enough to evaporate. Reseal the diagonal joints and give each droplet a depression to settle into.
The Shaker only processes Wet Sand, so dry input leaves it idle. Route water into the supply before the machine, and the doubling effect comes along with it.
A lone Shaker sheds its leftover Residue very slowly. Slope several into a descending staircase so gravity keeps the tops clear as they process.
Once the early rush is over, the next step is usually not blind expansion but learning to read your support systems and the quality of your layout.
Most early instability is really a circulation problem, so the water page is the most natural next stop.
Once the first loop behaves, the next gain usually comes from cutting waste and shortening weak routes rather than adding more machines.
Shared builds show a calm early setup that already holds water and keeps its loop intact, so you can copy the shape while you learn why it works.
Before researching around the problem, confirm that Sand and Water meet in one visible place and reliably produce Wet Sand.
Checkpoint: you can point to the exact tile where the conversion happens.
Keep the first line small enough that you can see input, Gold drop and Residue movement without guessing.
Checkpoint: a stalled line has one visible cause, not five possible causes.
If Water wanders, leaks or evaporates before it reaches Sand, extra Shakers only multiply the same failure.
Checkpoint: the basin holds Water and the mixing zone stays close to the input.
When the first loop runs without manual rescue, copy the working shape outward instead of rebuilding from scratch.
Checkpoint: new capacity preserves separate input, product and byproduct paths.
The first two hours go better when you prove Wet Sand, Shaker input, and one stable loop in order instead of spreading effort across several half-working systems.
Early sequencing still changes with terrain, nearby resources, and how quickly your first loop stabilizes. Treat these tips as priorities, not as one fixed speedrun route.
Reliable Water contact, visible Wet Sand creation, one readable Shaker loop, and expanding only after those pieces already hold together.
Because scaling multiplies hidden failures. A broken mixing point or buried byproduct path becomes much harder to diagnose after expansion.
Use blueprints to compare shapes, then troubleshoot only specific recurring symptoms instead of rebuilding the whole line blindly.
Source note: Use the linked source for the underlying reference. Early Access details can change.
Official source